
Blog post template
Every time you sit down to write a blog post, do you stare at a blank screen wondering how to start? Do you know what you want to say but get stuck trying to figure out how to organize it?
You’re not alone. One of the hardest parts of blogging isn’t coming up with ideas or even doing the research. It’s figuring out how to structure each post so it flows well, keeps readers engaged, and actually helps them solve whatever problem brought them to your blog.
The good news is that you don’t need to reinvent the wheel every single time. A simple, reliable blog post template can save you hours of frustration and help you write clearer, more effective posts — whether you’re writing your first article or your hundredth.
This article walks through a straightforward template that works for almost any blog post. It’s not fancy, it’s not complicated, and you don’t need to be an experienced writer to use it. You just need a basic structure to follow so you can spend less time wondering what comes next and more time actually writing.
Why You Need a Blog Post Template
Before we get into the actual template, it’s worth understanding why having one matters in the first place.
It speeds up your writing process
When you have a clear structure to follow, you’re not wasting time figuring out what section should come next or how to transition between ideas. You already know the framework. All you need to do is fill it in with your specific content.
For someone trying to write a blog post in limited time, this makes a real difference. Instead of spending 20 minutes staring at a blank page wondering where to begin, you can jump straight into writing because the structure is already decided.
It makes your posts easier to read
Readers don’t read blog posts the way they read books. They scan. They skim. They jump around looking for the specific information they need.
A well-structured post with clear sections, helpful subheadings, and logical flow makes it much easier for readers to find what they’re looking for and stay engaged with your content. Without structure, even great information can feel overwhelming or hard to follow.
It reduces decision fatigue
Every time you write a post, you’re already making dozens of decisions about what to include, how to explain things, what examples to use, and how to phrase your points. If you also have to decide how to structure the entire post from scratch, that’s one more mental burden.
A template removes that decision. You’re not deciding whether your post needs an introduction or a conclusion or how many main sections to include. Those decisions are already made. You’re just deciding what goes into each section.
It helps you stay focused
When you’re working without structure, it’s easy to wander off-topic or include things that don’t really fit. A template keeps you on track. If something doesn’t fit into one of the sections of your template, that’s usually a sign it doesn’t belong in the post — or that it should be a separate post entirely.

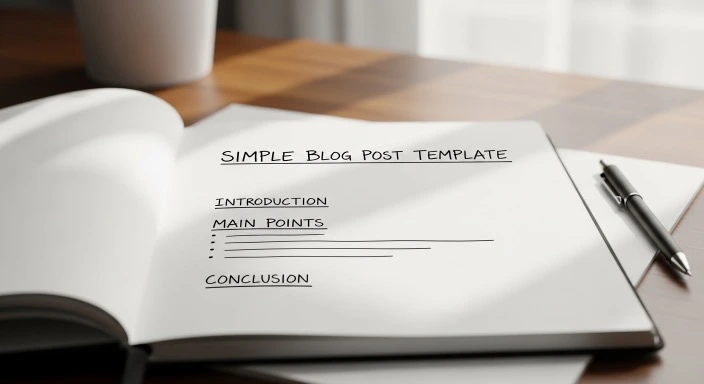
The Simple Blog Post Template (Step by Step)
Here’s the template. It’s straightforward, it’s flexible, and it works for the vast majority of blog posts you’ll ever write.
The Core Structure
1. Headline
Clear, specific title that tells readers exactly what the post is about and why they should read it.
2. Introduction (2-4 paragraphs)
Hook the reader, identify the problem or question, and preview what you’re about to cover.
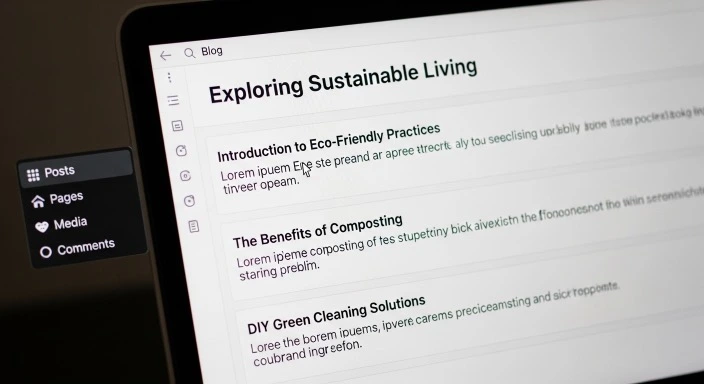
3. Main Body (3-5 sections)
Each section covers one main point or step. Use clear H2 or H3 subheadings. Include examples, explanations, or details as needed.
4. Conclusion (2-3 paragraphs)
Briefly recap the main points, reinforce the takeaway, and suggest what the reader should do next.
5. Optional: FAQ or Additional Tips
Address common questions or add a final helpful section if it fits the post.
That’s it. Five parts. The beauty of this structure is that it’s simple enough to remember and use every time, but flexible enough to work for almost any type of post.
Now let’s break down each section so you know exactly what to include and why.
Section 1: The Headline
Your headline is the first thing readers see, and it determines whether they click on your post or keep scrolling. It needs to be clear and specific.
What makes a good headline
A good headline does three things:
- It tells readers what the post is about. No mystery, no vagueness. If your post is about meal planning on a budget, say that.
- It hints at the benefit. Why should someone read this? What will they learn, solve, or understand after reading?
- It’s specific. “How to Save Money” is too broad. “7 Simple Ways to Cut Your Grocery Bill in Half” is specific and actionable.
You don’t need to be clever or witty in your headlines unless that fits your blog’s voice. Clear and direct almost always beats clever and confusing.
Common headline formulas that work
- How to [Achieve Result]: “How to Plan a Week of Meals in Under an Hour”
- [Number] Ways to [Benefit]: “5 Ways to Make Mornings Less Chaotic”
- The [Adjective] Guide to [Topic]: “The Busy Parent’s Guide to Meal Prep”
- What to Do When [Problem]: “What to Do When You’re Too Tired to Cook”
Pick a formula that fits your content and fill in the specifics. You don’t have to overthink this.
Section 2: The Introduction
The introduction has one job: convince the reader to keep reading. If your intro doesn’t hook them quickly, they’ll leave before they get to your main points — no matter how good those points are.
How to write an introduction that works
A solid introduction typically includes three elements, in this order:
1. The hook. Start with something that grabs attention and makes the reader think “yes, that’s exactly my problem” or “I want to know more about this.” This could be a relatable scenario, a surprising fact, a question, or a brief story.
Example: “You’ve just spent 45 minutes staring at your fridge, trying to figure out what to make for dinner. Again. And you’re pretty sure you threw away half the groceries you bought last week because they went bad before you could use them.”
2. The problem or question. Clearly state what problem you’re solving or what question you’re answering in this post. Make sure it aligns with why someone would have clicked on your headline.
Example: “Meal planning should make life easier, but most advice assumes you have hours to spend cooking and organizing. If you’re already stretched thin, that’s not helpful.”
3. The preview. Briefly tell readers what they’re about to learn or what the post will cover. This sets expectations and helps them decide if they want to keep reading.
Example: “This post walks through a simple meal planning system that takes less than an hour per week and actually fits into a busy schedule. No complicated recipes, no endless prep work — just a straightforward approach that works.”
Keep your introduction short. Two to four paragraphs is usually plenty. Any longer and you risk losing readers before you get to the actual content they came for.
Section 3: The Main Body
This is where you deliver on the promise you made in your headline and introduction. The main body is the heart of your post, and how you structure it matters.
Break it into clear sections
Don’t write one giant wall of text. Break your content into 3 to 5 main sections, each covering one key point, step, or idea.
Each section should have a clear subheading (H2 or H3) that tells the reader what that section is about. These subheadings serve two purposes: they make your post easier to scan, and they help readers jump to the specific information they need.
If you’re writing a how-to post, your sections might be steps in a process. If you’re writing a list post, each section might cover one item on the list. If you’re explaining a concept, each section might explore a different aspect of that concept.
What to include in each section
Within each section of your main body, aim to include:
- The main point or explanation. What is this section teaching or explaining?
- Why it matters. Help readers understand why this point is important or relevant.
- How to apply it or an example. Give readers something concrete — a specific example, a step-by-step instruction, or a practical tip they can use.
You don’t need to include all three in every section, but most strong sections will have at least the first and third elements.
Keep paragraphs short
Online readers scan more than they read. Short paragraphs (2-4 sentences) are much easier to scan than long, dense blocks of text. If a paragraph is getting longer than about 5 sentences, look for a natural place to break it into two.
Use formatting to improve readability
Don’t be afraid to use bullet points, numbered lists, bold text, or other formatting tools to make your content easier to consume. These aren’t just aesthetic choices — they genuinely help readers process information more quickly.
Section 4: The Conclusion
The conclusion is often the most overlooked part of a blog post, but it’s more important than most people realize. A good conclusion gives readers a sense of closure and clarity about what they’ve just learned.
What to include in your conclusion
A strong conclusion typically includes:
1. A brief recap. Summarize the main points or key takeaways from your post in just a sentence or two. You don’t need to rehash everything — just remind readers of what they’ve learned.
2. A final thought or reinforcement. Drive home why this matters or reassure readers that they can do this. Give them confidence or motivation to take action.
3. A next step. What should the reader do now? This could be trying one of your tips, reading another related post, leaving a comment, or simply thinking about how to apply what they’ve learned.
Keep your conclusion short — two to three paragraphs is usually enough. The goal isn’t to introduce new information. It’s to wrap up clearly and leave the reader with a sense of completion.
What not to do in a conclusion
- Don’t introduce new ideas that weren’t covered in the main body. If it’s important enough to include, it belongs earlier in the post.
- Don’t write vague or generic conclusions like “I hope you found this helpful!” without any substance. Add value even in your closing.
- Don’t make your conclusion longer than your introduction. Keep it tight.
Section 5: Optional Additions (FAQ, Tips, Resources)
Depending on your post, you might want to add one more section after your conclusion. This isn’t required for every post, but it can add value when it fits.
FAQ section
If there are common questions readers might have after finishing your post, a short FAQ section can address them quickly. Keep answers brief — just a sentence or two for each question.
Example questions might include clarifications about specific points, common concerns, or practical details you didn’t cover in the main body.
Quick tips or bonus advice
If you have a few small, related tips that didn’t quite fit into the main flow of your post, you can add them as a “Quick Tips” or “Additional Advice” section at the end.
Resources or further reading
If there are tools, books, articles, or other resources that would genuinely help readers dive deeper into your topic, you can list them in a brief “Resources” section.
Only include optional sections if they add real value. Don’t tack them on just to make your post longer.
How to Use This Template for Different Types of Posts
The template we’ve covered works for most blog posts, but it’s flexible enough to adapt to different post types. Here’s how to adjust it for common formats.
For how-to posts
Your main body becomes a series of steps. Each section covers one step in the process, explained clearly with any necessary details or warnings.
Make sure your steps are in the right order — the reader should be able to follow them sequentially and achieve the result you promised in your headline.
For list posts
Your main body is divided by list items. Each section covers one item from your list — one tip, one tool, one idea, one mistake to avoid, etc.
Keep each item roughly the same length and level of detail unless one genuinely needs more explanation than the others.
For explanatory posts
If you’re explaining a concept or answering a question, your main body breaks the topic into logical chunks. Each section explores one aspect or component of the larger topic.
Use examples generously in these posts. Abstract concepts become much clearer with concrete examples.
For personal or story-based posts
Even personal posts benefit from structure. Your main body might tell the story chronologically, or it might explore different lessons or reflections from an experience.
The key is still to give readers clear sections rather than one long narrative. Break the story or reflections into digestible pieces with subheadings.

What to Avoid When Using a Blog Post Template
Templates are helpful, but they’re not meant to make every post sound identical. Here are some common mistakes to avoid.
- Don’t let the template make your writing stiff or formulaic. The structure is there to help you organize your thoughts, not to dictate your voice. Write naturally within the framework.
- Don’t force content into sections where it doesn’t fit. If something genuinely doesn’t fit the template, that’s okay. Adjust the template or save that content for a different post. The template serves you — you don’t serve the template.
- Don’t skip outlining just because you have a template. The template gives you the overall structure, but you still need to plan what specific points you’ll cover in each section. Spend 5-10 minutes outlining before you start writing.
- Don’t write the same introduction every time. Even though your introductions will follow a similar pattern (hook, problem, preview), they should feel fresh and specific to each post. Vary your hooks and examples.
- Don’t neglect transitions. Just because you have clear sections doesn’t mean you can jump abruptly from one to the next. Use smooth transitions to guide readers through your post naturally.
The goal is to use structure to make writing easier and posts clearer, not to create cookie-cutter content.
Making the Template Work for Your Blogging Style
Once you’ve used this template a few times, you’ll start to develop a feel for how it works and where you might want to adjust it to better fit your style or topics.
Keep what works, adjust what doesn’t
Maybe you find that your posts always need more than 5 sections in the main body, or that you rarely need an FAQ section. That’s fine. The template is a starting point, not a rigid rule.
Pay attention to which posts flow easily and which ones feel forced. Over time, you’ll develop your own version of this template that fits your specific needs.
Create variations for your most common post types
If you frequently write the same type of post — say, product reviews or tutorial posts — consider creating a slightly more detailed template for that specific format. You can keep the basic structure but add specific elements that always show up in that post type.
For example, if you write product reviews, you might always include sections for features, pros, cons, price, and alternatives. Save that as your review template so you don’t have to recreate it each time.
Experiment with order and emphasis
While the basic structure (intro → body → conclusion) is pretty universal, how you organize your main body can vary. Some posts work better with your strongest point first. Others build toward your strongest point at the end.
Try different approaches and see what feels most natural for your content and most helpful for your readers.
Frequently Asked Questions
Do I really need to use a blog post template for every post I write?
Not necessarily. A template is a tool to make writing easier and faster, especially when you’re starting out or feeling stuck. Some experienced bloggers can structure posts naturally without consciously following a template. But even they’re usually following some kind of implicit structure — they’ve just internalized it. For most bloggers, especially beginners or anyone trying to write efficiently, having an actual template to follow saves time and produces more consistent, readable posts.
Won’t using a template make all my posts sound the same?
Only if you let it. A template provides structure, not content. Two people can use the exact same template and produce completely different posts because they’re filling that structure with different ideas, examples, voices, and perspectives. Think of it like building a house — many houses use similar basic layouts (kitchen, living room, bedrooms, bathrooms), but they don’t all look or feel the same because of how they’re designed and decorated. Your template is the layout. Your content is the design.
What if my post doesn’t fit neatly into this template?
Then adjust the template or use a different one. This structure works for the majority of blog posts, but not every single one. If you’re writing something truly unique — a deeply personal essay, an interview, a narrative story — you might need a different approach. The template is meant to help, not constrain. Use it when it’s useful and set it aside when it’s not.
How long should each section of my blog post be?
There’s no universal rule, but as a general guideline: introductions are usually 2-4 paragraphs (100-200 words), each main section is typically 2-5 paragraphs (150-400 words depending on complexity), and conclusions are 2-3 paragraphs (75-150 words). These are rough estimates — the real measure is whether each section is long enough to fully cover its point without unnecessary padding. Some sections will naturally be longer than others, and that’s fine.
Should I write my headline first or last?
Either works, but many bloggers find it easier to write a working headline first (to give direction), write the post, and then refine the headline at the end based on what the post actually became. You don’t have to stick with your first headline idea. It’s often clearer what the best headline should be after you’ve written the content and can see exactly what you covered and how.
Final Thoughts
The biggest obstacle to consistent blogging isn’t a lack of ideas or even a lack of time. It’s the friction of figuring out how to structure each post from scratch every single time you write.
A simple blog post template eliminates that friction. You’re not spending mental energy on structure. You’re spending it on content — on saying something useful, clear, and helpful to your readers.
The template outlined in this post isn’t fancy or complicated. It’s just a reliable framework: headline, introduction, main body with clear sections, conclusion, and optional additions as needed. That’s enough structure to keep you organized without being so rigid that it stifles your voice or creativity.
As you use this template more, you’ll develop your own shortcuts and adjustments. You’ll know which sections tend to be longer for your style of writing. You’ll figure out which types of introductions work best for your audience. You’ll find your rhythm.
But you don’t need to wait until you’re an experienced blogger to benefit from structure. Start using this template on your next post. Outline your sections before you write. Follow the basic flow. See how much easier and faster the writing becomes when you’re not constantly deciding what comes next.
Writing doesn’t have to be overwhelming. With a simple structure to follow, it becomes more like filling in the blanks than staring at a blank page wondering where to begin. And that makes all the difference when you’re trying to blog consistently around an already busy life.
If you want more guidance on the actual writing process within this structure, How to Write a Blog Post in 30 Minutes walks through practical techniques for getting words on the page efficiently. And understanding What Blogging Really Involves helps set realistic expectations about the writing process overall.
The template is here. The structure works. Now all you need to do is use it.
Our Authority Sources
The template structure and best practices in this article are informed by established content creation principles and proven blog writing frameworks from respected sources in the blogging and content marketing industry.
Backlinko — 7 Proven Blog Post Templates
Backlinko, founded by SEO expert Brian Dean, provides data-driven SEO and content marketing strategies. Their breakdown of proven blog post templates, including detailed structural elements for different post types, informed the template approach and section guidelines in this article. Backlinko’s blog content has helped grow their site to over 487K monthly visitors through tested frameworks.
Ahrefs Blog — 6 Simple Blog Post Templates
Ahrefs is one of the most respected names in SEO and content marketing. Their guide to blog post templates breaks down the core structural elements that work for different content types, with practical examples from successful posts. Their emphasis on adapting templates while maintaining clear structure influenced the flexibility guidance in this article.
HubSpot Blog — Blog Post Templates in Google Docs
HubSpot is a leading marketing platform with extensive experience in content creation at scale. Their blog post template resources and breakdown of the three essential components (introduction, body, conclusion) provided foundational guidance for the simplified structure presented in this article. HubSpot has been helping businesses create effective content for over a decade.
Semrush Blog — Blog Post Templates for Compelling Content
Semrush is a comprehensive SEO and marketing toolkit used by millions of marketers worldwide. Their analysis of time-tested blog post structures and the specific elements that make each section effective informed the section-by-section breakdown in this article. Their practical, implementation-focused approach aligns with the goal of providing actionable guidance for busy bloggers.